Showing posts with label food. Show all posts

Saturday, September 29, 2012

Early Morning Baking Buddy

One thing I really missed during the last trimester of my pregnancy was baking.  Quite frankly, I didn't have the energy before I was put on bedrest, and afterwards I sure wasn't going to risk Caylee jumping the gun just to bake!  The fact that she did jump the gun completely aside, of course lol.  So, while Caylee has been sleeping, I've been reintroducing myself to my bakeware, spices, and baking cabinets!

My first post-pregnancy projects were basic banana bread and pumpkin bread loaves.  They turned out quite nicely, but I was wanting something a little sweeter.  So, I found a recipe online for a cream cheese layer to go with pumpkin bread and gave it a go!  So far, it hasn't quite worked with the pumpkin bread--mostly it either rises to the top or mixes with the rest of the batter.  Oh well, it sure tastes good!

My next project was an amazing Blueberries and Cream Coffee Cake Pie recipe by Cleo Coyle!  She is the author of my first and favorite mystery series--The Coffeehouse Mysteries.  I've read all of them on my Kindle and loved each one!  One amazing aspect of her books is all of the scrumptious foods she describes therein--even more amazing, she includes the recipes in the back of each volume!  Out of respect, I'm not going to post the recipe for the Coffee Cake Pie here, but you can find it in her book Roast Mortem.  And yes, all of her titles are plays on aspects of coffee!  While I won't include the recipe, I will include the picture of my pie--and boy was it yummy!  I made it for Caylee's first outing to Uncle Ethan and Aunt Julie's house for a play date with Lucy, and it was quite a hit!

My other baking project was a loaf of Cinnamon Blueberry Cream Cheese Bread.  Last Saturday, I threw the recipe together myself, modifying my basic pumpkin bread recipe and combining and modifying several of the cream cheese filling recipes I had found online.  My first step, of course, was to preheat the oven to 350 degrees.  Of course, I had my baking buddy on deck.  

I wasn't sure how long she'd stay asleep, so I measured out all of my dry ingredients for the bread first:
1 3/4 cups all-purpose flour
1 1/2 cups granulated sugar
1 teaspoon baking soda
1 1/2 teaspoons of cinnamon (next time I'm going to up that to 1 Tbsp--I wanted more cinnamon taste!)
I then measured out the ingredients for the cream cheese layer:

1 8oz package of cream cheese, microwaved for 15 seconds
1 egg
1 Tbsp all-purpose flour
1 teaspoon vanilla extract
1/2 cup granulated sugar
Next, I mixed all of the cream cheese layer ingredients in my mixer until mostly smooth.  Caylee-bear woke up at that point lol.  We took a break for a diaper change and then got back to work!  I poured the cream cheese mix into a giant measuring cup with a spout and then washed out the mixer.

Once it was dry, I poured the dry bread ingredients in and used the mixer to blend them.  Next, I measured out the non-dry ingredients for the bread:
2 eggs
2 teaspoons vanilla extract
1/2 cup vegetable oil
1/3 cup water

I poured all of that into my blender and mixed it together with the dry ingredients until smooth.  While that was blending, I pulled out my 9 ounces (1 1/2 small tubs) of frozen blueberries and tossed them in about 1 Tbsp of flour.  This is a trick I learned from Cleo Coyle's recipes to help absorb excess moisture from the blueberries while they bake!  Next time I might use more blueberries, but this time I carefully folded the flour-coated blueberries into the bread mix.  I definitely didn't want to smoosh them!

After that was done, I carefully poured some of the batter into my already-Pamed and floured bread pan.  I then added a layer of the cream cheese mix.  I could tell right away that the cream cheese mix was not going to layer as I had originally intended.  The blueberries make the bread batter thicker, but the cream cheese mix was especially runny.  Next time I'll refrigerate it for a bit.  This time I went ahead and added more blueberry bread mix, then cream cheese and topped it off with the remaining bread mix.

In my oven, it ended up taking 70-75 minutes to bake at 350 degrees.  The blueberries sunk, resulting in a fruit layer at the bottom, which I rather enjoyed.  The cream cheese marbled instead of layering, but it still looked pretty and tasted pretty darn good!  At least, my little brother Austin and his girlfriend Fanny both enjoyed it!  I was glad to be able to make them something yummy while they were in town, especially since they watched Caylee-bear Saturday night so Bryan and I could go on a dinner date!

All in all, it was a success even with with modifications I'll make next time.  It's so good to be baking again!

Thursday, April 28, 2011

Creamy Lime Pie

Even though I've been using Weight Watchers recipes for the past four months, I'm still regularly surprised at how YUMMY some of their recipes turn out!  My recent find is their recipe for a Creamy Lemon Pie...which I turned into a Creamy Lime Pie, to suite my husband's preference.

INGREDIENTS
6 whole reduced-fat cinnamon graham crackers
2 Tbsp butter
11 oz fat-free sweetened condensed milk
2 large eggs
1/2 cup fresh lime (or lemon) juice
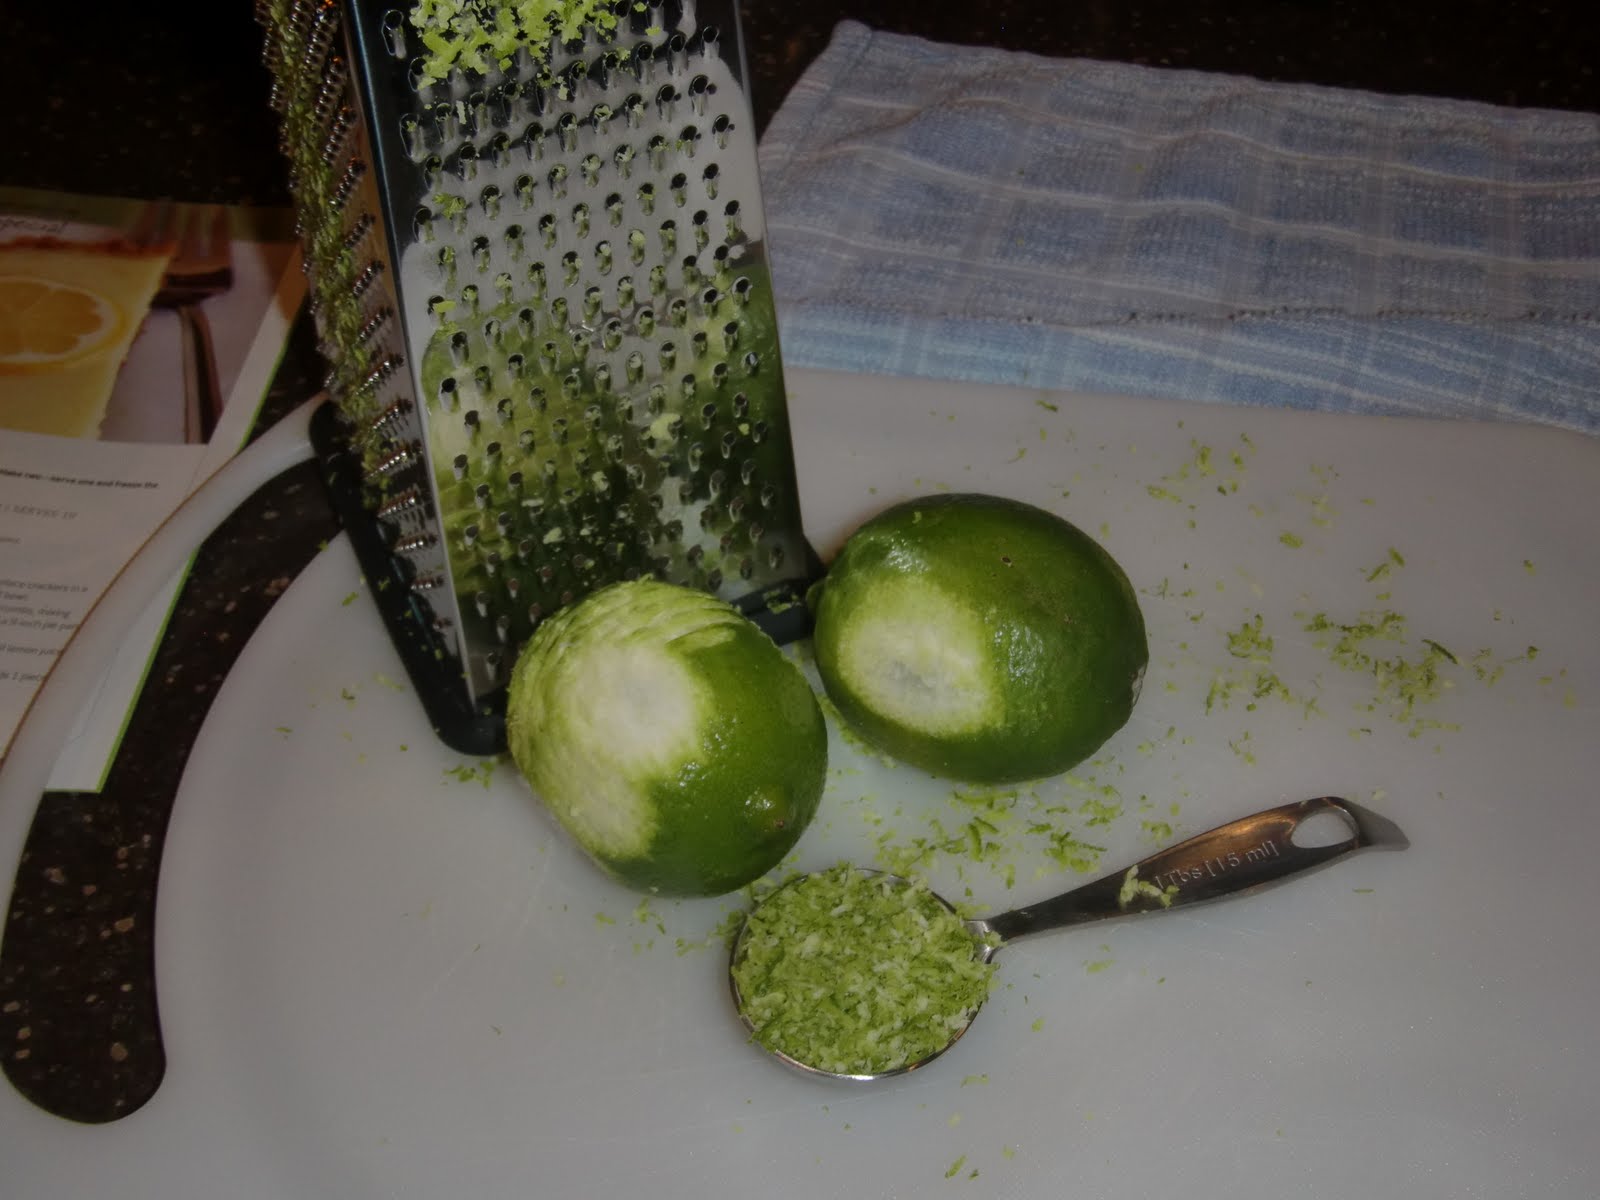
2 limes (or lemons) for making 1 Tbsp lime (or lemon) zest

The very first step is to preheat the oven to 350 degrees.  Next, put the graham crackers into a ziplock bag and smash/crush them into fine crumbs with a rolling pan.  Or at least, this is the method I used--you could also grind the crackers into fine crumbs with a food processor.  Mine was dirty so I went with the more physical option lol.

Next, melt the 2 tablespoons of butter in a small bowl.  Add the fine crumbs to the butter and mix the two together with a fork until all the crumbs are moistened by the butter.  Next, spray a 9" pie plate with Pam and press the crumbs evenly into the pie pan to form a crust.

Pop the pie plate into the refrigerator while you make the filling--this way the crust has an opportunity to actually set a little bit.  To make the filling, assemble all of the ingredients--the sweetened condensed milk, eggs, lime juice and limes.

In a medium bowl, mix the condensed milk and eggs together until the mixture is smooth.  This actually takes a bit of strength and time to do--silly stubborn mixing ingredients!
Next, grate the limes until you have enough zest for one tablespoon.  Make sure to use the side of the grater with medium holes.  The little bitty holes seem like a good idea, but they don't give you a nice zest and they're a pain in the butt to clean.  Once you have that, mix the zest and lime juice into the milk-and-eggs mixture, stirring until everything has been thoroughly combined.

Now, pull the pie plate out of the fridge and CAREFULLY pour the mixture into the pie crust.  I emphasize carefully because, well, I wasn't careful and had a bit of a mess to clean up.

Finally, pop the pie into the oven for 20 minutes.  The recipe called for 15 minutes of baking, but my pie didn't set up enough, so I let it bake for another 5 minutes beyond that.  Then it was perfect!  I didn't get a picture of the finished product--my silly camera died.  But it was slightly browned on top and barely jiggly when I shook it.  Finally, Let the pie cool completely and then place it in the refrigerator for 12-24 hours.  The pie has its best taste and consistency when served chilled.  Yumyumyumyum.  It's a great summertime pie, that's for sure!  Enjoy!

Thursday, March 31, 2011

Feta and Pesto Stuffed Basil Chicken

It's a very descriptive title isn't it?  Lol.
I found this recipe in my 5 Ingredient WeightWatchers Cookbook, and it has quickly become a favorite around here.  The best part?  I modified the recipe to make it SUPEReasy instead of just easy.  The other best part?  Only 5 ingredients!

INGREDIENTS
Chicken Breasts with Rib Meat, approx. 1 pound
Reduced Fat Feta Cheese, 1/2 cup
Basil Pesto, 2 Tablespoons
Black Pepper, 1/4 teaspoon
Dried Basil
 
The first step is to preheat the oven to 350 degrees.
While the oven is preheating, trim the icky stuff--ligaments, fat, that slimy "skin" stuff--off the chicken breasts.  Then, if you're trying to be a good little WeightWatcher like me, trim one of the breasts down to 4 ounces.  Sometimes, if you get three big enough breasts, you can just cut one in half and have two 4 ounce breasts.

Next, measure out 1/2 a cup of feta cheese and place it in a small bowl.  Add 2 Tablespoons of the basil pesto and the 1/4 teaspoon of black pepper.  Using a fork--yes, a fork--mix these all together in the bowl.  I've found that, since the feta cheese is so chunky, the best way to mix these ingredients is the actually smoosh them together using the tines of the fork, only occasionally stirring to fully combine everything.
 
Once the mixture is done, set it aside.  Get a sharp and small knife and cut a slit in the thick part of each chicken breast.  DO NOT cut all the way through the breast, nor cut all the way along the side.  Your goal is to make a pocket in the chicken breast, being careful to avoid puncturing the top or the bottom.  Once the pockets are made, fill each breast with approximately 2 Tablespoons of the feta-pesto-pepper mixture.
 
Now, get a large baking dish and spray it down with Pam.  I prefer Olive Oil Pam myself, but that's because I've only recently discovered how AWESOME Olive Oil is for you, and how yummy it makes food taste!

Once the baking dish is well oiled, place the chicken breasts into the dish, spacing them evenly.  Next, sprinkle the top of each chicken breast with dried basil.  How much you use depends on how much you like basil!  I like it quite a bit, so I used about 1/4 teaspoon on each chicken breast.  That amount gave nice coverage plus great basil flavor and tingle!

The next-to-last step is to pop the dish in the oven, which should have long finished preheating by now.  Bake the chicken breasts for 45 minutes.  I checked on mine at 40 minutes, just to make sure they weren't getting over-done, but they took the full 45 minutes to finish baking and still maintained excellent moisture and flavor!

The very last step is to serve and enjoy!  I served mine with green beans and corn, mostly because that's all I had on hand lol.  I definitely recommend your favorite veggies as sides, and my hubby enjoyed it with a Sierra Nevada Kellerweis!  I hope y'all enjoy it as well!

LinkWithin

Related Posts with Thumbnails